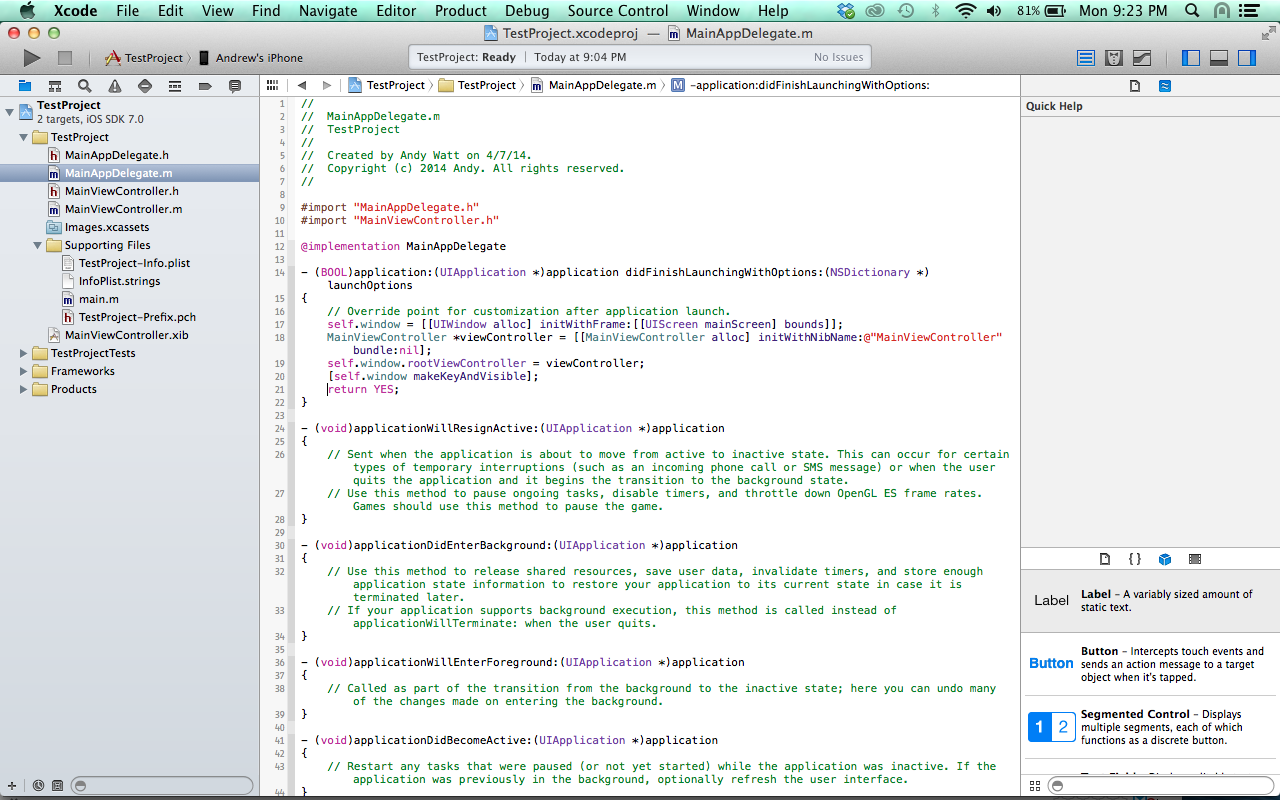
XCode 5 doesn’t allow you to start a project without a storyboard, but storyboards are not appropriate for every project. Storyboards may not be a good fit for large apps or projects with multiple developers collaborating through Git or SVN. Luckily, there is a simple way to set up a project to use Nib files instead:
*** Click on the images below to view a larger version ***
- Create a new project with a Single View Application template
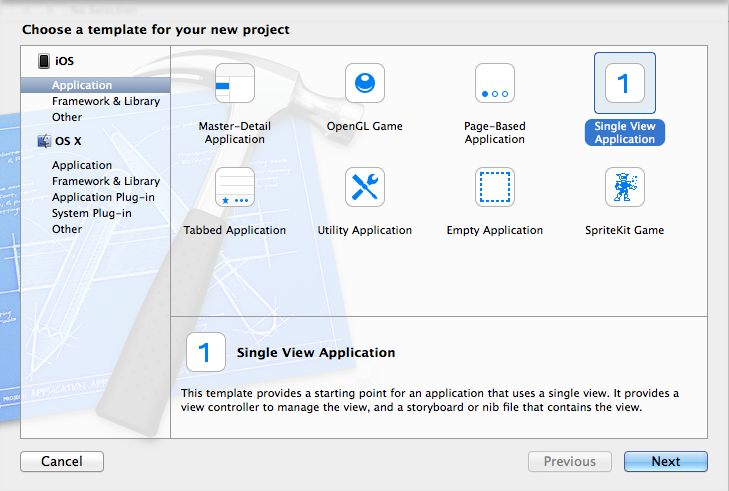
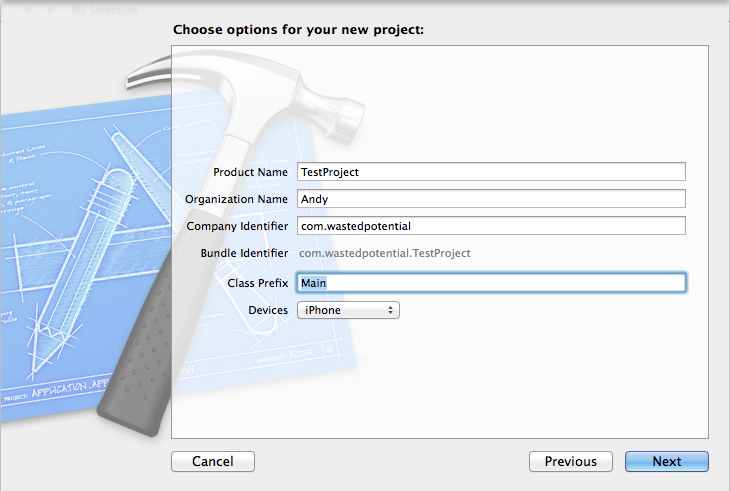
- Fill in the project name, identifier, etc and save it.
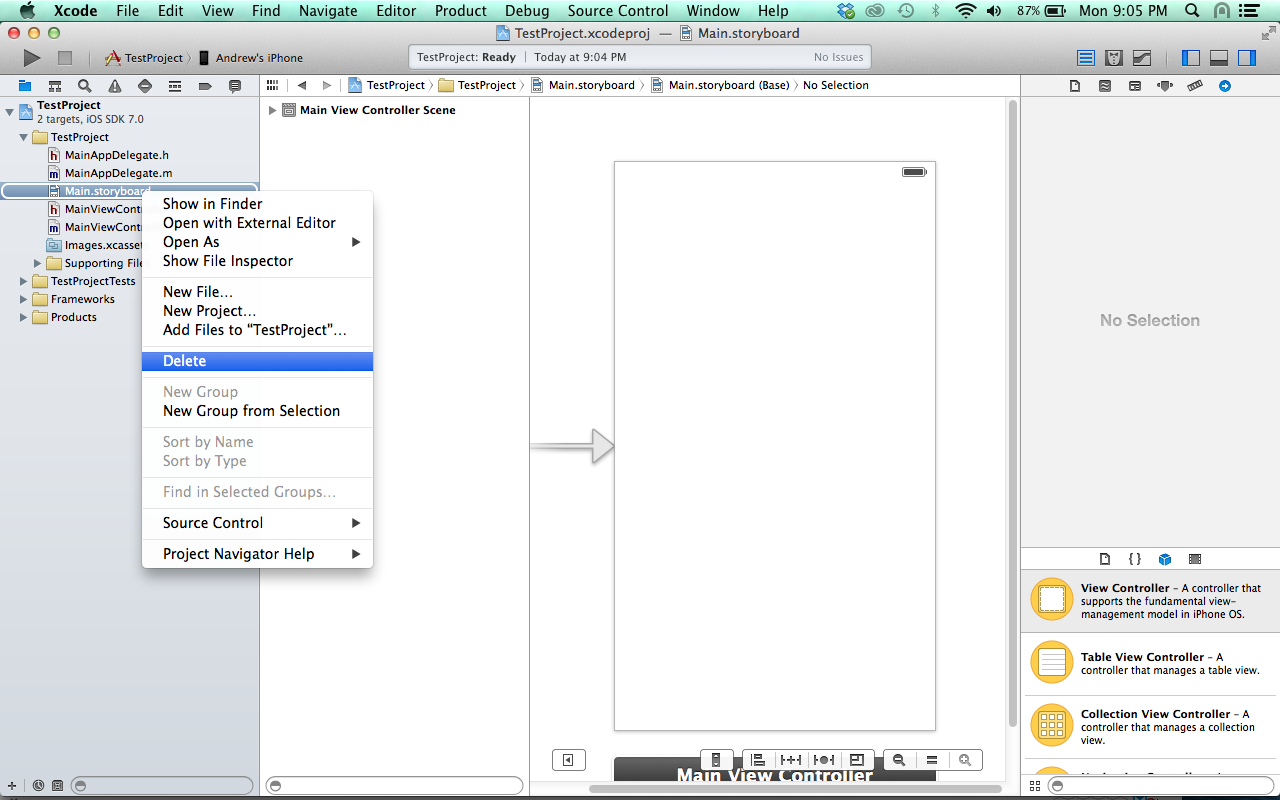
- In the project navigator, delete the storyboard file. Choose “Move to Trash” in the dialog box.
- In the project navigator, open the Supporting Files folder and click on your project plist file to open it. Remove the “Main storyboard file base name” by clicking the minus icon on that row of the plist. If this entry is missing, then you don’t need to do anything.
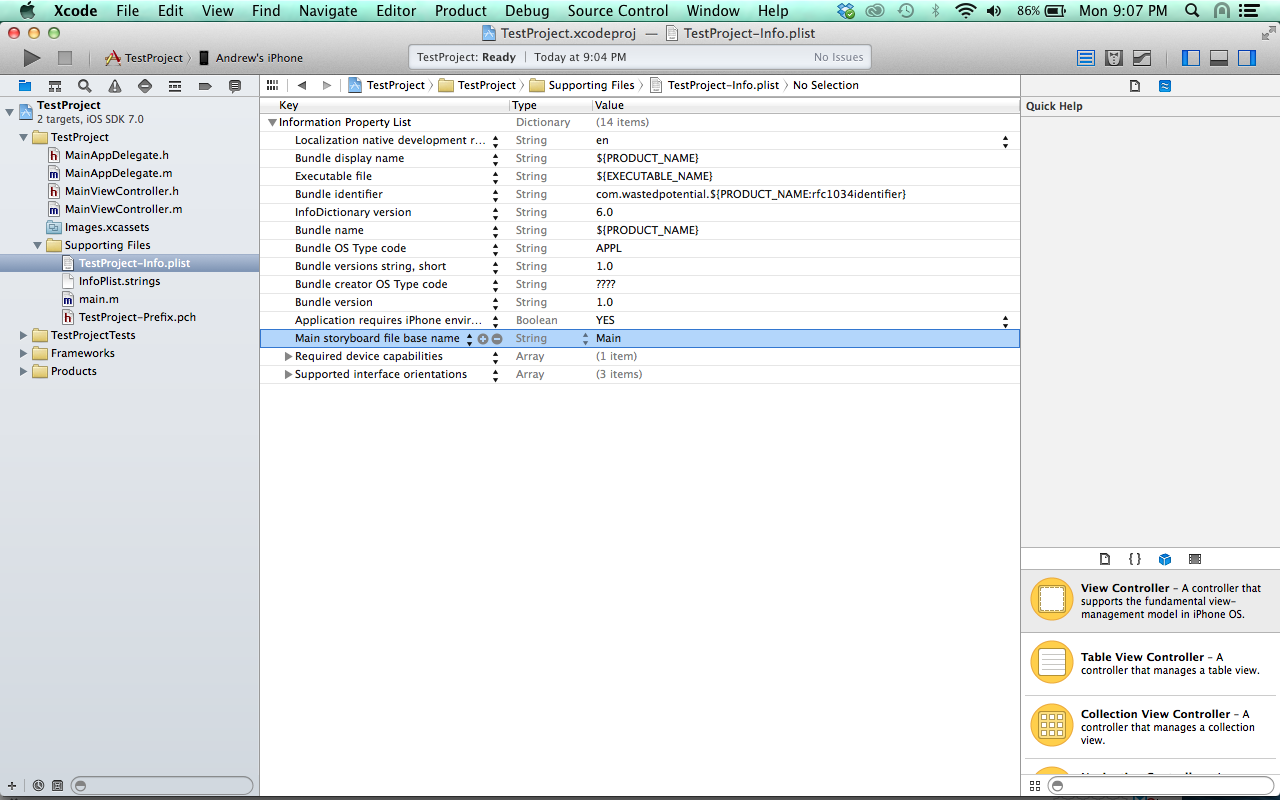
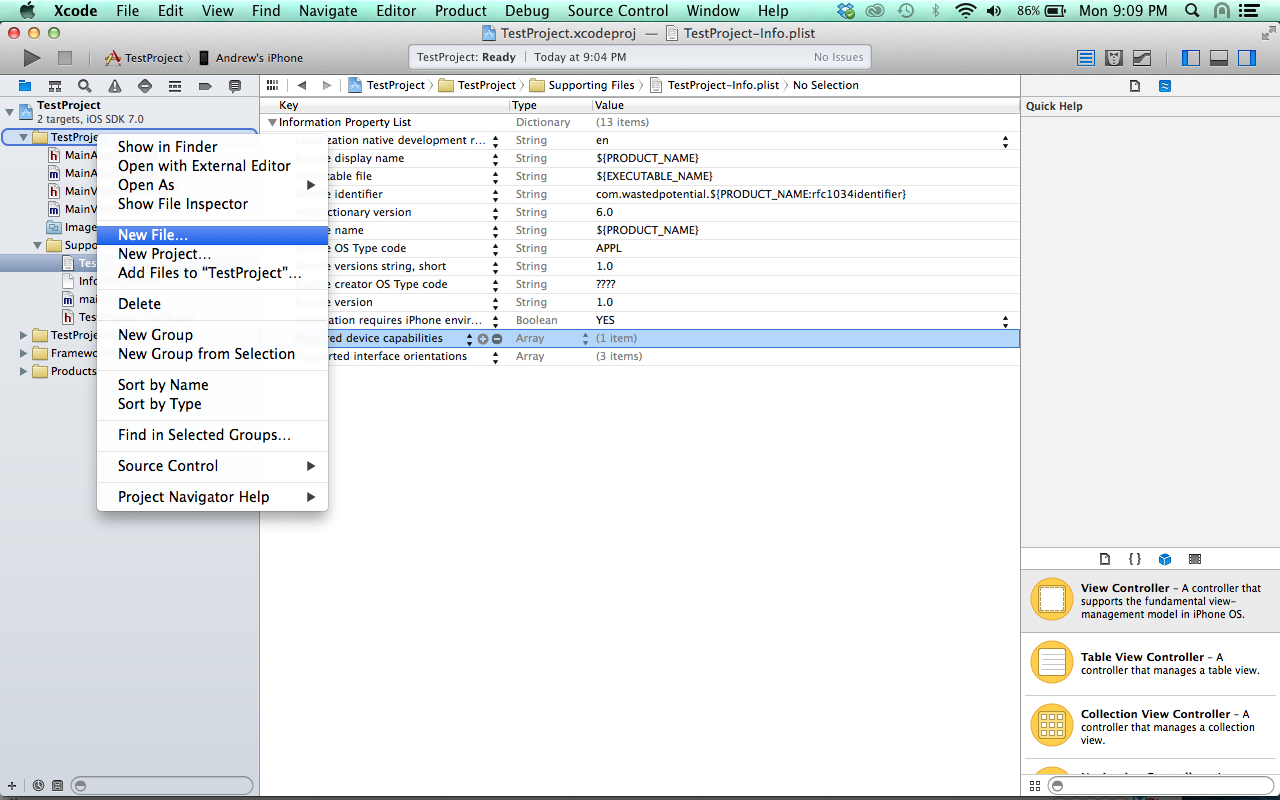
- In the project navigator, right-click the main project folder and choose “New File…”
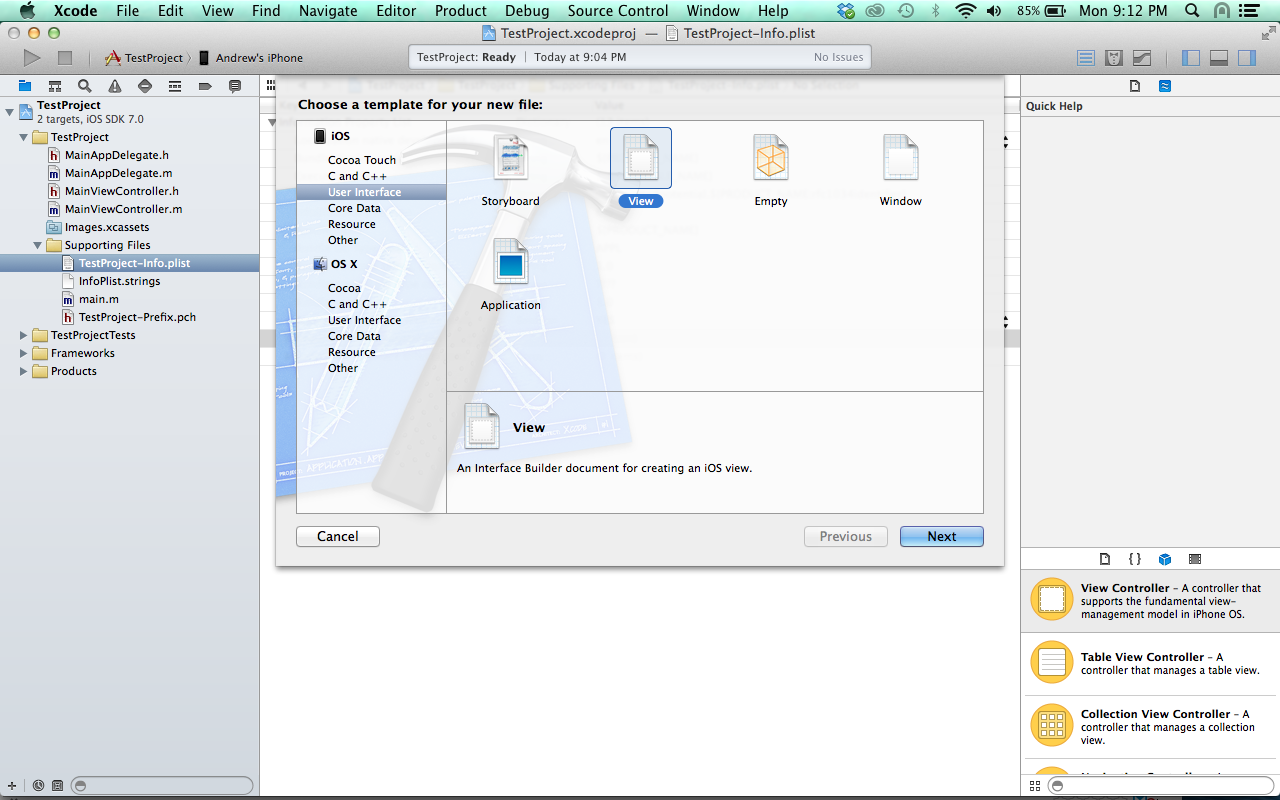
- select ios > User Interface and choose a View template.
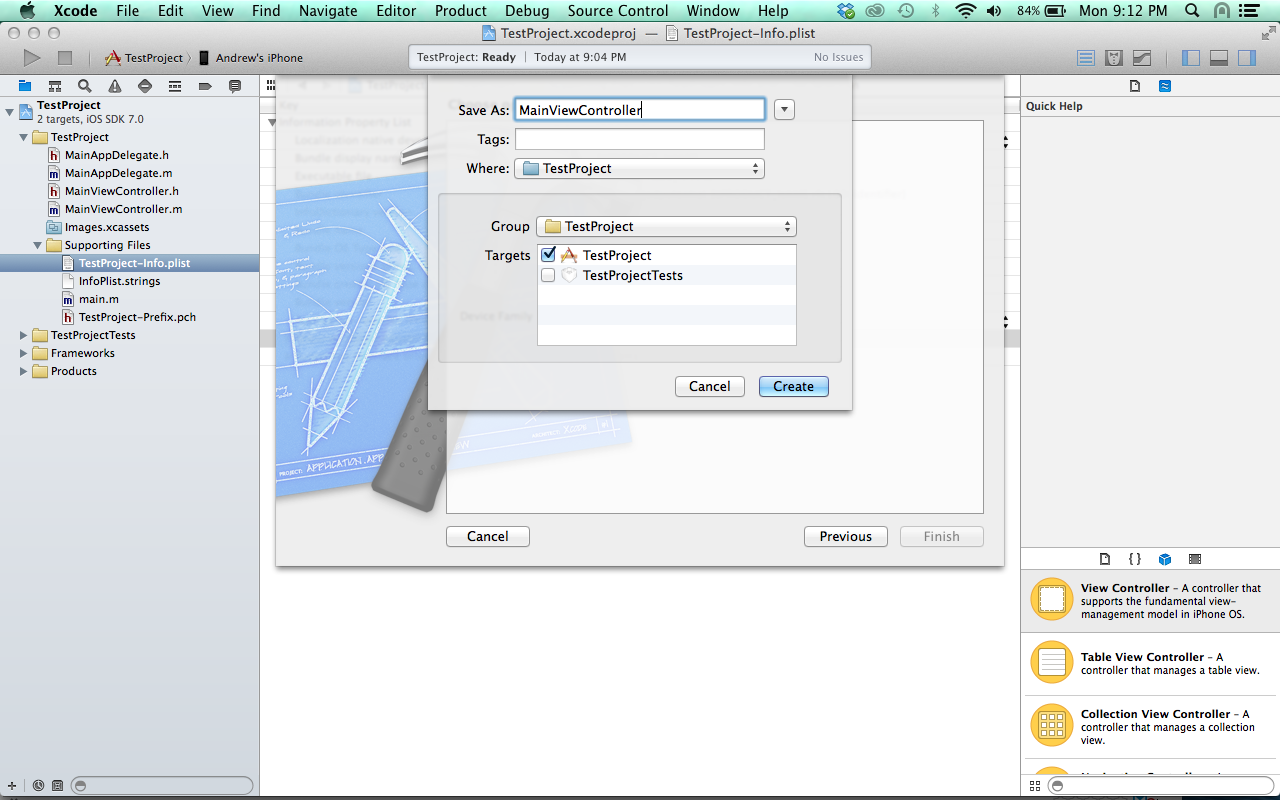
- Give it the same name as your main view controller and click “Create”
- open the new NIB file and click on File’s Owner in the document outline.
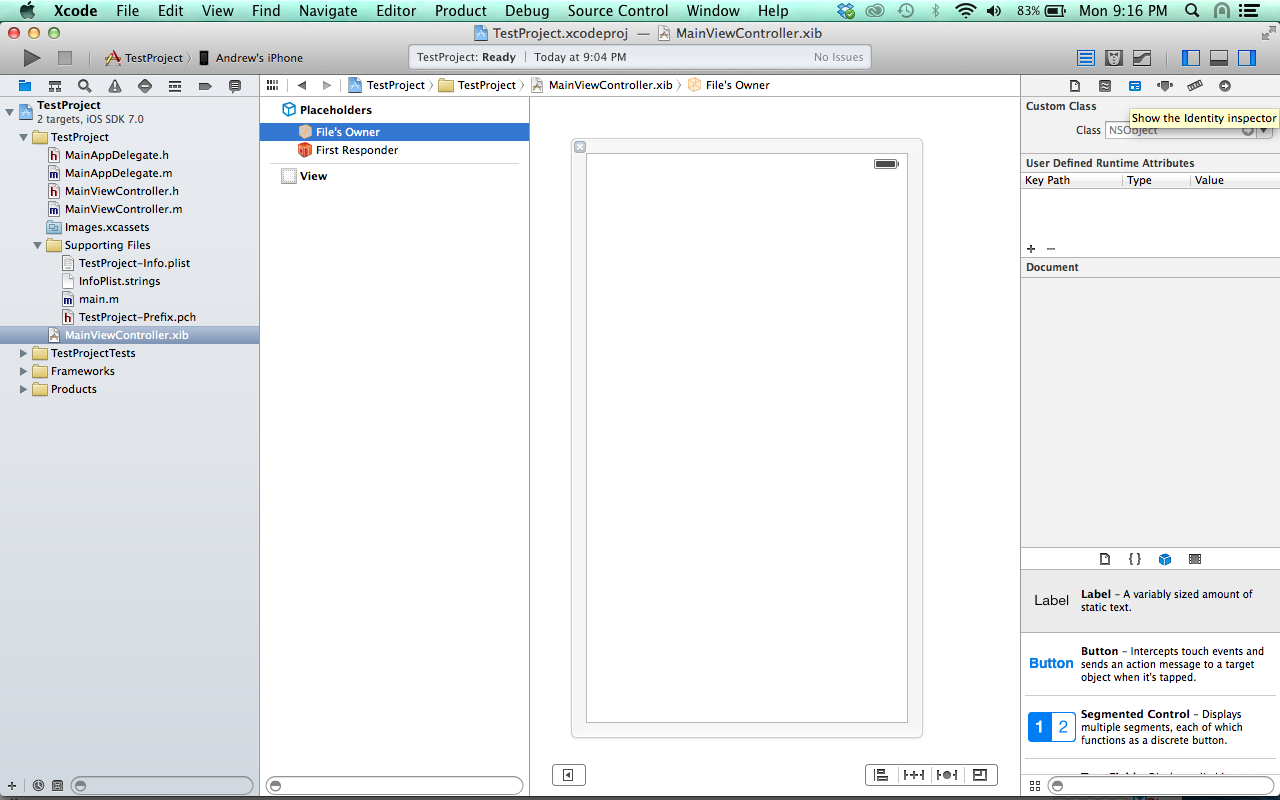
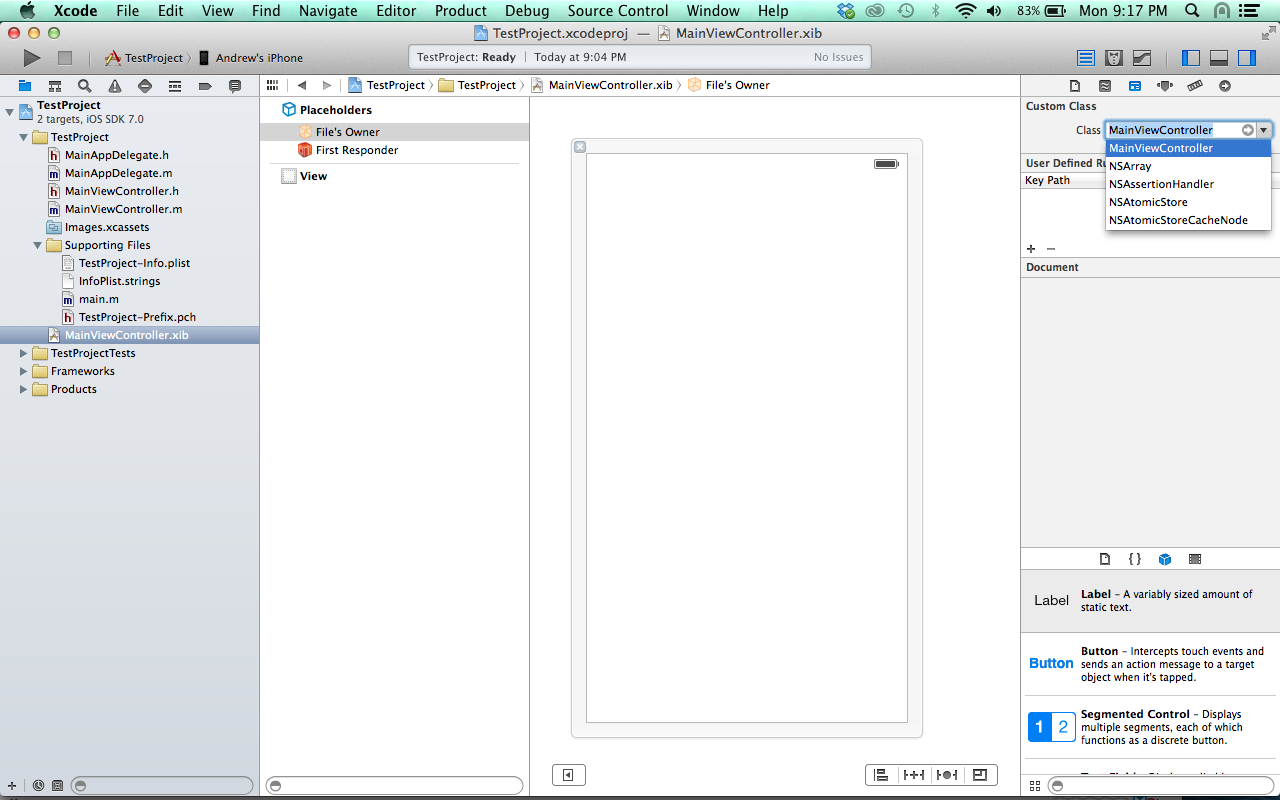
- in the Utilities panel on the right, choose the Identity Inspector and select your ViewController class in the dropdown list.
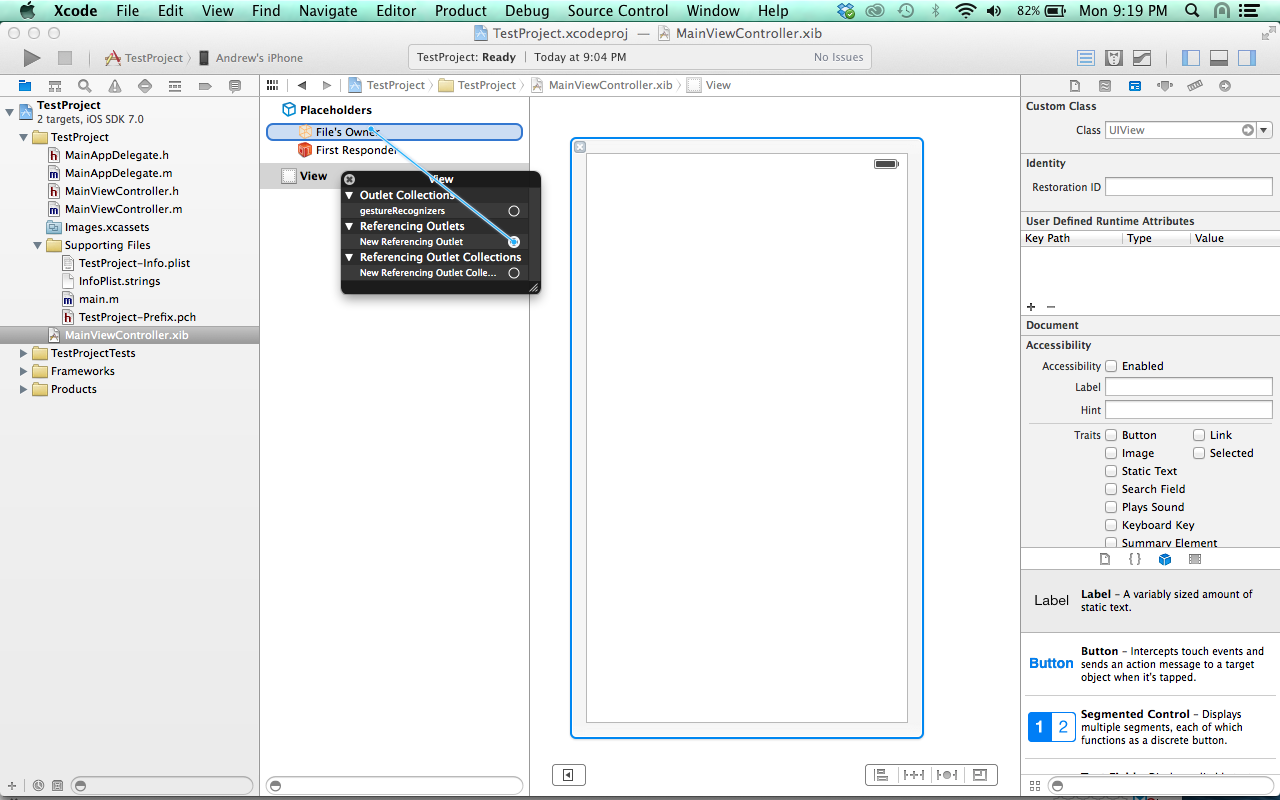
- Right-click the root view in the document outline to open the Connections popup. Then click and drag from the New Referencing Outlet to the File’s Owner. Another popup will appear. Click on the word “view.”
- Finally, update the
application:didFinishLaunchingWithOptions:method with this code:- (BOOL)application:(UIApplication *)application didFinishLaunchingWithOptions:(NSDictionary *)launchOptions { // Override point for customization after application launch. self.window = [[UIWindow alloc] initWithFrame:[[UIScreen mainScreen] bounds]]; MainViewController *viewController = [[MainViewController alloc] initWithNibName:@"MainViewController" bundle:nil]; self.window.rootViewController = viewController; [self.window makeKeyAndVisible]; return YES; }
Now, build your project and run it. Voila! you’re done! I mostly grabbed these instructions from this link, but added some more detail and screenshots for those of us who are not Xcode experts. Happy Coding!

