Papervision3D is an incredible open-source library for building 3D applications in Flash. You can create basic 3D objects and animate them with Actionscript, but if you really want to create something cool, you need to import a 3D model made with a program like 3D Studio Max, Maya, or Blender.
Several different 3D file formats can be imported into Papervision – the most popular format seems to be Collada (*.DAE), which is an XML format. However, I recently noticed that *.3DS files could also be imported to Papervision using the Max3DS class. 3DS is an old file format for 3D Studio Max, but many 3D programs will still export this format. Since it is a binary format, it creates much smaller files than Collada, which can significantly decrease model load times, but I was curious if there was any noticeable performance difference once the models were imported. In theory, the models should perform identically once they are imported. So I created a test to see if this was true.
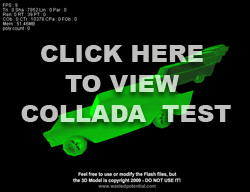
I created a quick model of a 57 Chevy station wagon in 3D Studio Max 9 for my test. The finished model has 1833 vertices and 1802 faces. Please note that I’m a noob when it comes to 3D modeling and I know that this model has some issues, but I really only cared that it imported correctly to PV3D. Anyway, I exported the model to both Collada and 3DS formats. The exported file stats are:
wagon5.3DS = 103 KB
wagon5.DAE = 488 KB
I then created 2 Flash files that are identical except for the type of model that is imported for rendering. Click one of the images below to view the results in Papervision.
As you can see, they look essentially identical. Each SWF loads the model 5 times and renders it to the screen with a FlatShadeMaterial. How did they perform? Well, that depends…
When I first created these SWFs, I tested them on my work computer. It’s a pretty fast Dell desktop PC with lots of RAM running Windows Vista and Flash Player 10. The 3DS format performed noticeably better on my work machine. The frame rates were similar for both models, but the memory usage was much lower than the Collada format. The 3DS model rotation also looked smoother than the Collada model and the 3DS file had much quicker file load time. It looked like a clear winner.
Then I spent some time cleaning up the files on my laptop at home and the performance tests didn’t show the same results. My laptop is a Lenovo PC that isn’t as fast as my work computer and I run Windows XP with Flash Player 9. While testing at home, the 3DS file still had lower memory usage and the animations both looked the same. The frame rate difference was still marginal.
So, which one performs better? It may be dependent on the machine, the operating system, and the version of Flash you are running. I still give the 3DS format the advantage for it’s lower file size and memory usage. It may be a good idea to build a toggle into your Papervision project that allows you to import either format and do a lot of testing as you go before deciding on one format or the other. As always, keep your target audience (and their computers) in mind.
Feel free to use the Flash and Actionscript files to run your own tests or simply steal the code for your project. The methods that I used for loading and initializing the models may save you some time and frustration when dealing with the quirks of both the Collada and Max3DS parsers in Papervision. For example, the Max3DS parser would not allow me to initialize the model with a FlatShadeMaterial, so I had to use a ColorMaterial. But, once it was loaded, it would allow me to replace the ColorMaterial with a FlatShadeMaterial.
Please do not use the 3D model I have provided for production work. I have provided the model for you to use in these experiments, but it is copyrighted and I would really appreciate you not using it for anything else.
As always, you can download the source files here.


